Padding vs. Margin vs. Border: What’s The Difference?

Introduction
Padding, margin, and border.
If you’re quite new to CSS, these three terms might sound a bit confusing to you.
Or at least, they were for me.
And that’s why I’m here, to help bring clarity to this topic.
In this article, you’ll learn the difference between padding, margin, and border and when to use each so that you can create pixel-perfect layouts for your projects.
The Box Model In CSS
DO NOT skip this section as it will make everything much easier to understand.
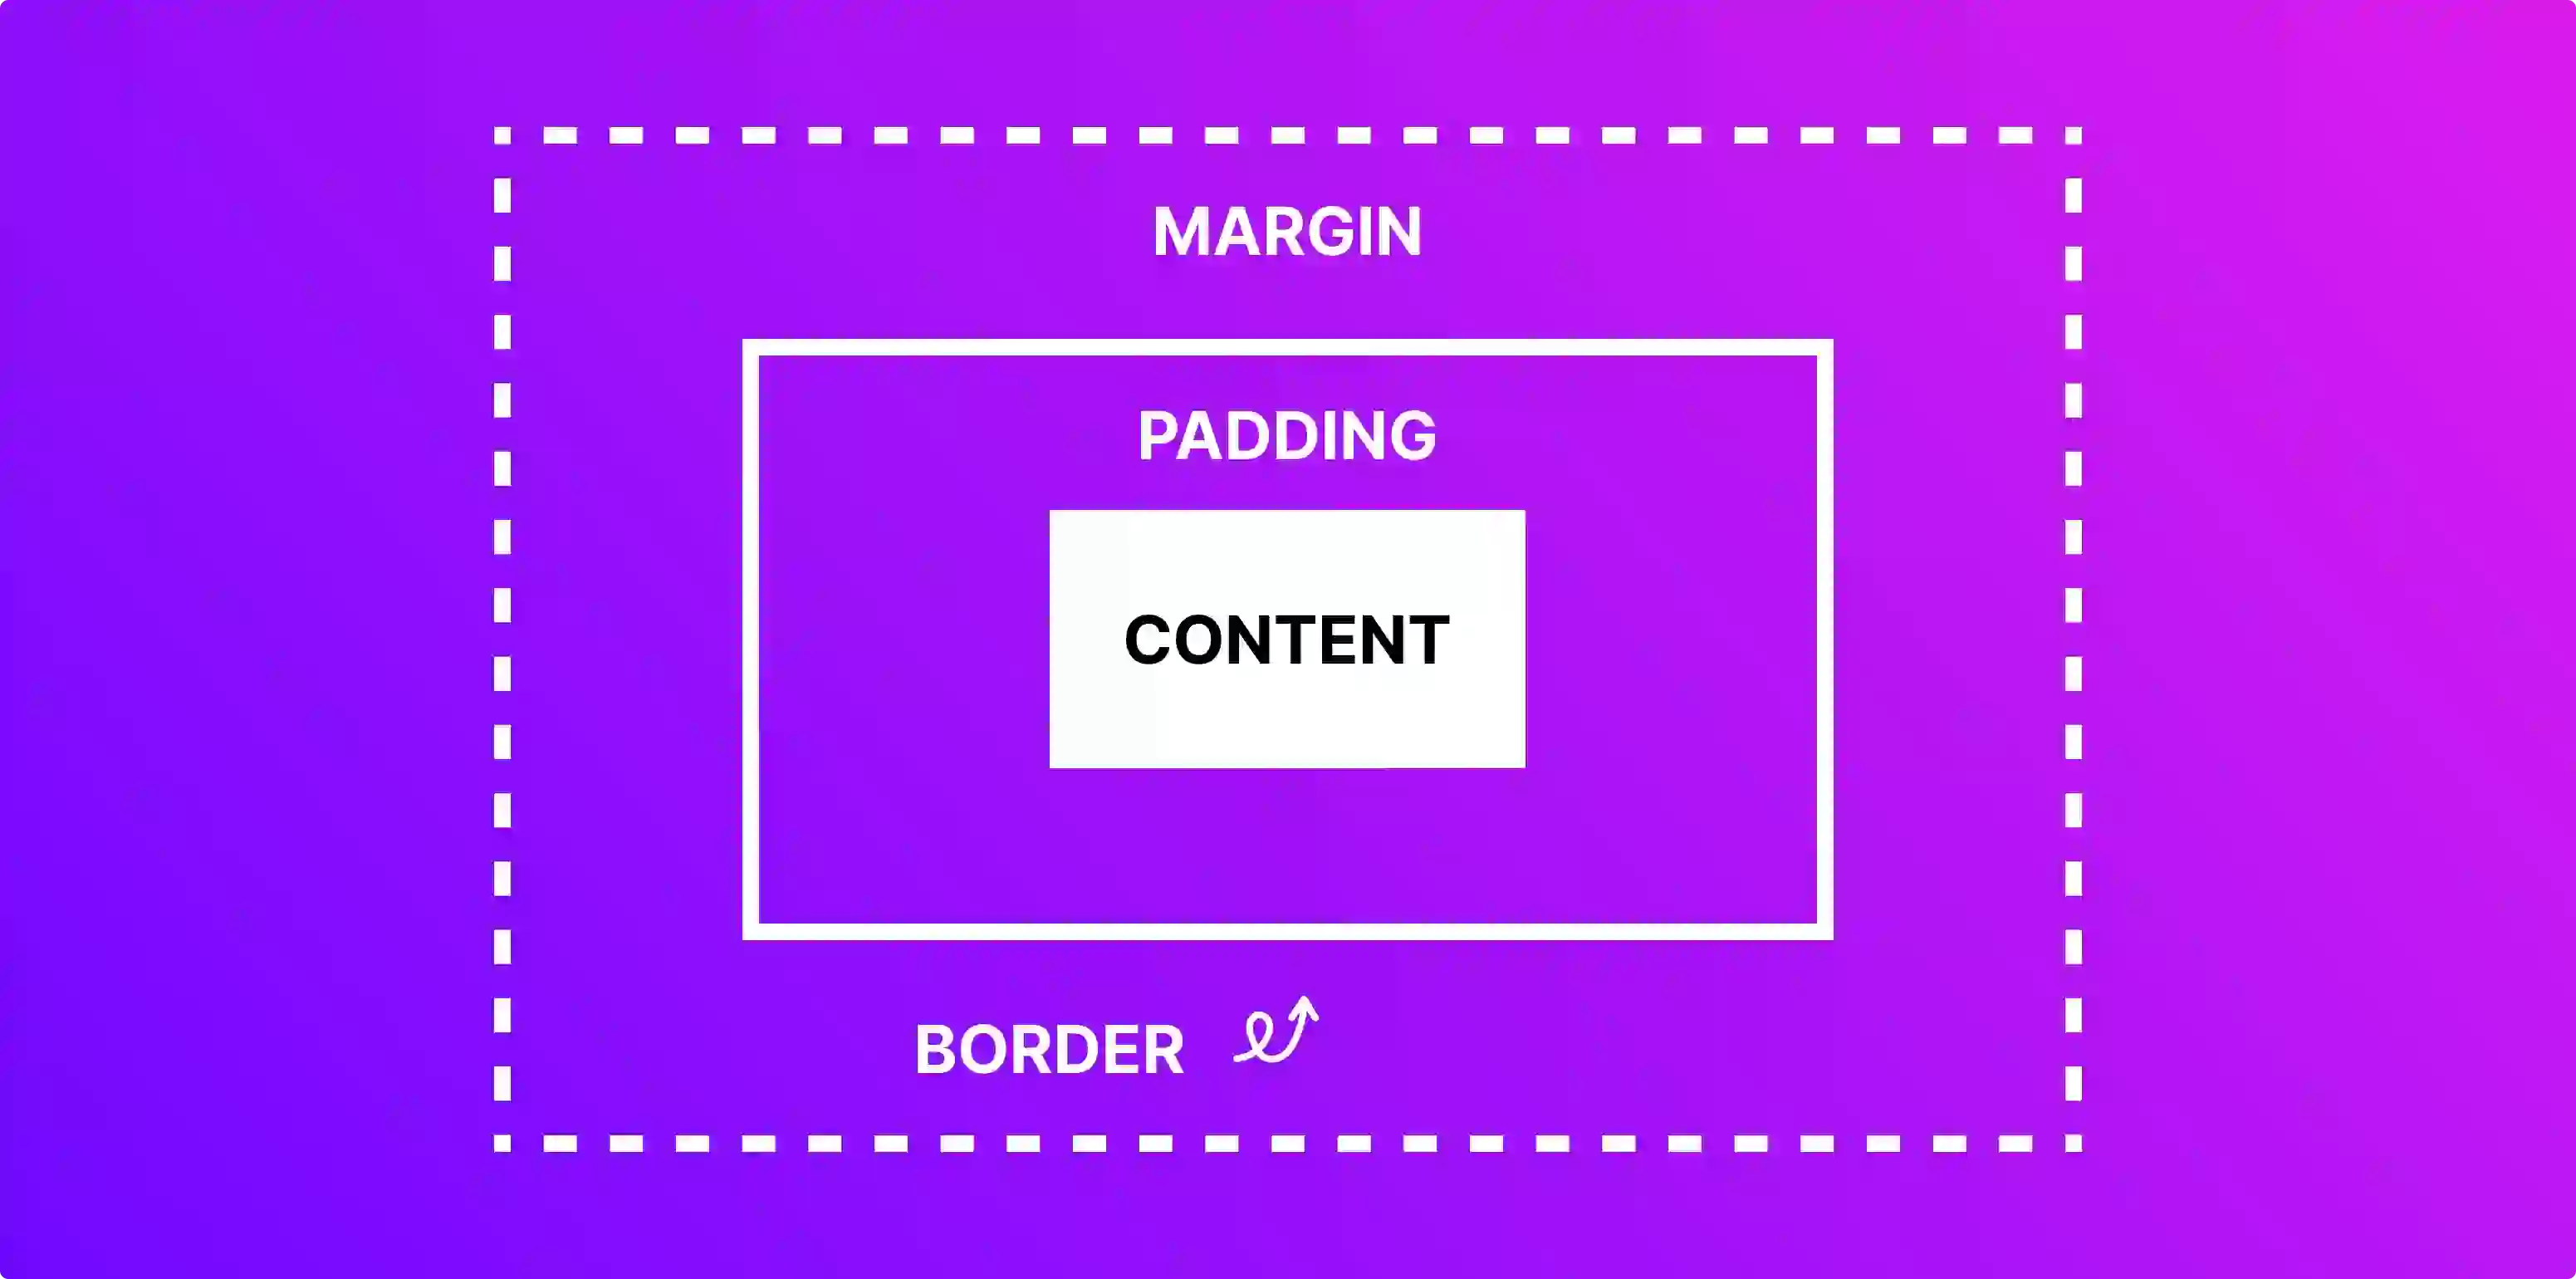
In CSS, the box model is a conceptual model that represents how HTML elements are displayed and laid out on a web page.
What does that mean? Good question.

It basically means that every element on your HTML document has a box around it that dictates how your element is displayed on your page.
This box consists of four main parts: the content, padding, border, and margin.
Content: The content is the actual text, image, or other data displayed inside the element. This one is relatively self-explanatory.
Padding: The padding is the space between the content and the element’s border. It provides a visual buffer around the content and can be used to add spacing or emphasis.
Border: The border is the line that surrounds the element and separates it from its surroundings. It can be customised with different colours, styles, and widths.
Margin: The margin is the space between the element’s edge and its containing block’s edges. It provides a visual space around the element and can be used to control its position in relation to surrounding elements.
Here’s a visual representation of the box model:

Box Model Sizing
When you set a fixed width and height for an element in HTML, you just set the width and the height of the content, not the whole box.
Therefore, to calculate an element’s total width/height, you’ll have to add the padding, the width of the border, and the margin.

Example:
If you set a <div> to be 200px wide and add a padding of 20 pixels on all sides, it will now be 240px.
If you want to change this behaviour and include the padding, and the border in an element’s total width and height (not the margin), you’ll have to set the “box-sizing” property to “border-box”.
Padding vs. Margin vs. Border
Padding: Creating Space Within An Element
Padding is the space between the content of an element and its border.
It is used to create space within an element and to separate the content from the border.

Margin: Creating Space between Elements
Margin, contrary to padding, controls the space between an element's border and its surrounding elements.
It's like creating a buffer zone around the box, separating it from other elements on your layout.

Border: Defining the Element's Edge
Border, as the name suggests, is the visible (or invisible, for that matter) boundary around an element.
It sits precisely between the padding and the margin of your HTML element.
It is often used to define the shape and appearance of an element.

When To Use Padding vs. Margin
If you’re still a bit confused about which one you should use, here’s a simple rule of thumb for you.
In general, use padding when you want to adjust the look of an element and margin when you want to change how that element is placed in relation to other elements on the page.
If you like practicality over theory, here’s an example for you.
Example
Enough theory for now. Let’s look at a practical example.
Let’s say that you want to create two buttons side to side.
While there are a million and one ways to do so, here’s how we’re going to do it:
We’ll start with two div elements and style them a bit to get to a decent pair of buttons.
I’ll attach screenshots from a Codepen file so you can see the code and the results side by side.
Sounds good?
Let’s start!
Here’s the starting setup:

As you can see, we only have two <div>s with some text in it.
Note: I’ve placed them inside the body with a flex display so that they are side to side instead of one on top of the other.
Let’s start by giving them a border so they resemble something remotely similar to a pair of buttons.

As you can see, there’s no space between the border and the text.
Let’s fix it by giving them some padding.

Ok, let’s separate them a bit by adding some margin to the right of both elements.

And Whoola! We now have two buttons.
How To Set Padding, Margin, And Border In CSS
Setting Padding In CSS
If you’re creating your website from scratch, you’ll have to write your own style sheets (aka CSS files).
So, how do you do that?
You can define padding using the padding property, followed by values for each side:
Padding: 10px;
→ applies 10px padding on all sides.
Padding: 10px 20px;
→ adds 10px padding on the top and bottom and 20px on the left and right.
Padding: 10px 20px 30px;
→ sets padding values for top, left and right, and bottom.
Padding: 10px 20px 30px 40px;
→ defines all four sides separately (top, right, bottom, left).
If you only want to apply padding to one side, you can use one of the following properties:
Padding-top
Padding-right
Padding-bottom
Padding-left

Setting Margin In CSS
Good news!
Margin works exactly like padding.
Just swap the “padding” word with “margin,” and you’ll be alright.
I think there’s no need to repeat all the properties with just a word changed.
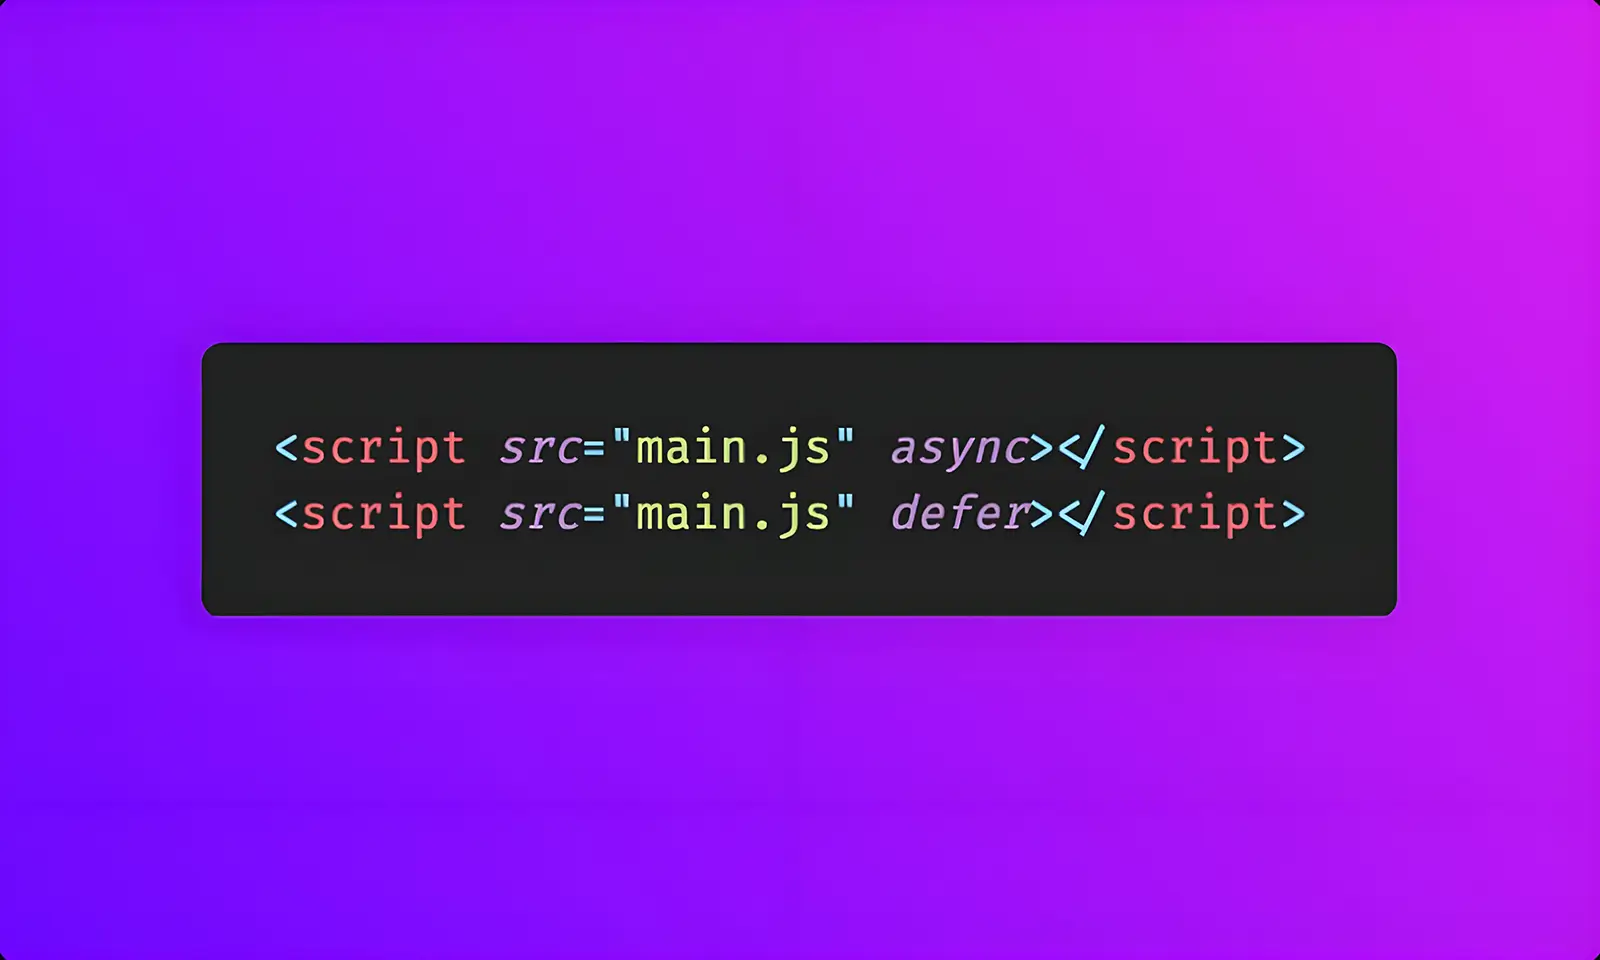
Pro Tip: Negative values are allowed when setting margin. This can be helpful if you want to create a layout with overlapping elements.
Setting Border In CSS
Borders are defined using the border property, which acts as a shorthand for three key sub-properties:
border-width
→ Specifies the thickness of the border. (e.g., border-width: 5px;)
border-style
→ Defines the visual appearance of the border (solid, dotted, dashed, etc.). (e.g., border-style: dotted;)
border-color
→ Sets the color of the border. (e.g., border-color: #ff0000;)
You can use the shorthand border property with all three values combined:
border: 5px solid #ff0000;
→ creates a 5px thick, solid red border.

Additional Resources
I’ve tried to cover all the basics for setting padding, margin, and border in CSS.
But, if you want a more in-depth explanation of all the properties regarding these three concepts, here are some additional resources that you can reference:
W3Schools - CSS Padding: https://www.w3schools.com/css/css_padding.asp
W3Schools - CSS Margin: https://www.w3schools.com/css/css_margin.asp
W3Schools - CSS Borders: https://www.w3schools.com/css/css_border.asp
MDN Web Docs - Padding: https://developer.mozilla.org/en-US/docs/Web/CSS/padding
MDN Web Docs - Margin: https://developer.mozilla.org/en-US/docs/Web/CSS/margin
MDN Web Docs - border: https://developer.mozilla.org/en-US/docs/Web/CSS/border
Summary
Here’s a quick summary for those who don’t want to read the whole article.
Padding adds visual breathing room within an element, while margin creates separation between elements.
The border defines the element’s edge and can be customised for various visual effects.
FAQs
Q1 - Why Can’t Padding Be Used Instead Of Margin?
Padding cannot be used instead of margin because it serves a different purpose. Padding adds space between an element’s content and its border. Margin adds space between an element and its surrounding elements.
Q2 - Does Padding Increase Size?
Yes, padding increases the overall size of an element due to how the box model works in CSS. However, you can change this behaviour by setting the “box-sizing” property of the element to “border-box”.
Q3 - Can Padding Be Negative In CSS?
No, padding cannot be negative in CSS.
Q4 - Why Do We Use Padding In Css?
We use padding in CSS to create space between an element’s content and its border.
Q5 - Why Do We Use Margin In Css?
We use margin in CSS to create spacing between elements and control the overall layout.
Conclusion
Thank you for taking the time to read the whole article. I hope you found it helpful.
If you need any help with building your website, don’t hesitate to reach out.
If you’ve found this article helpful, I kindly invite you to share it with a friend who might benefit from it!
Introduction
Padding, margin, and border.
If you’re quite new to CSS, these three terms might sound a bit confusing to you.
Or at least, they were for me.
And that’s why I’m here, to help bring clarity to this topic.
In this article, you’ll learn the difference between padding, margin, and border and when to use each so that you can create pixel-perfect layouts for your projects.
The Box Model In CSS
DO NOT skip this section as it will make everything much easier to understand.
In CSS, the box model is a conceptual model that represents how HTML elements are displayed and laid out on a web page.
What does that mean? Good question.

It basically means that every element on your HTML document has a box around it that dictates how your element is displayed on your page.
This box consists of four main parts: the content, padding, border, and margin.
Content: The content is the actual text, image, or other data displayed inside the element. This one is relatively self-explanatory.
Padding: The padding is the space between the content and the element’s border. It provides a visual buffer around the content and can be used to add spacing or emphasis.
Border: The border is the line that surrounds the element and separates it from its surroundings. It can be customised with different colours, styles, and widths.
Margin: The margin is the space between the element’s edge and its containing block’s edges. It provides a visual space around the element and can be used to control its position in relation to surrounding elements.
Here’s a visual representation of the box model:
Box Model Sizing
When you set a fixed width and height for an element in HTML, you just set the width and the height of the content, not the whole box.
Therefore, to calculate an element’s total width/height, you’ll have to add the padding, the width of the border, and the margin.

Example:
If you set a <div> to be 200px wide and add a padding of 20 pixels on all sides, it will now be 240px.
If you want to change this behaviour and include the padding, and the border in an element’s total width and height (not the margin), you’ll have to set the “box-sizing” property to “border-box”.
Padding vs. Margin vs. Border
Padding: Creating Space Within An Element
Padding is the space between the content of an element and its border.
It is used to create space within an element and to separate the content from the border.

Margin: Creating Space between Elements
Margin, contrary to padding, controls the space between an element's border and its surrounding elements.
It's like creating a buffer zone around the box, separating it from other elements on your layout.

Border: Defining the Element's Edge
Border, as the name suggests, is the visible (or invisible, for that matter) boundary around an element.
It sits precisely between the padding and the margin of your HTML element.
It is often used to define the shape and appearance of an element.

When To Use Padding vs. Margin
If you’re still a bit confused about which one you should use, here’s a simple rule of thumb for you.
In general, use padding when you want to adjust the look of an element and margin when you want to change how that element is placed in relation to other elements on the page.
If you like practicality over theory, here’s an example for you.
Example
Enough theory for now. Let’s look at a practical example.
Let’s say that you want to create two buttons side to side.
While there are a million and one ways to do so, here’s how we’re going to do it:
We’ll start with two div elements and style them a bit to get to a decent pair of buttons.
I’ll attach screenshots from a Codepen file so you can see the code and the results side by side.
Sounds good?
Let’s start!
Here’s the starting setup:

As you can see, we only have two <div>s with some text in it.
Note: I’ve placed them inside the body with a flex display so that they are side to side instead of one on top of the other.
Let’s start by giving them a border so they resemble something remotely similar to a pair of buttons.

As you can see, there’s no space between the border and the text.
Let’s fix it by giving them some padding.

Ok, let’s separate them a bit by adding some margin to the right of both elements.

And Whoola! We now have two buttons.
How To Set Padding, Margin, And Border In CSS
Setting Padding In CSS
If you’re creating your website from scratch, you’ll have to write your own style sheets (aka CSS files).
So, how do you do that?
You can define padding using the padding property, followed by values for each side:
Padding: 10px;
→ applies 10px padding on all sides.
Padding: 10px 20px;
→ adds 10px padding on the top and bottom and 20px on the left and right.
Padding: 10px 20px 30px;
→ sets padding values for top, left and right, and bottom.
Padding: 10px 20px 30px 40px;
→ defines all four sides separately (top, right, bottom, left).
If you only want to apply padding to one side, you can use one of the following properties:
Padding-top
Padding-right
Padding-bottom
Padding-left

Setting Margin In CSS
Good news!
Margin works exactly like padding.
Just swap the “padding” word with “margin,” and you’ll be alright.
I think there’s no need to repeat all the properties with just a word changed.
Pro Tip: Negative values are allowed when setting margin. This can be helpful if you want to create a layout with overlapping elements.
Setting Border In CSS
Borders are defined using the border property, which acts as a shorthand for three key sub-properties:
border-width
→ Specifies the thickness of the border. (e.g., border-width: 5px;)
border-style
→ Defines the visual appearance of the border (solid, dotted, dashed, etc.). (e.g., border-style: dotted;)
border-color
→ Sets the color of the border. (e.g., border-color: #ff0000;)
You can use the shorthand border property with all three values combined:
border: 5px solid #ff0000;
→ creates a 5px thick, solid red border.

Additional Resources
I’ve tried to cover all the basics for setting padding, margin, and border in CSS.
But, if you want a more in-depth explanation of all the properties regarding these three concepts, here are some additional resources that you can reference:
W3Schools - CSS Padding: https://www.w3schools.com/css/css_padding.asp
W3Schools - CSS Margin: https://www.w3schools.com/css/css_margin.asp
W3Schools - CSS Borders: https://www.w3schools.com/css/css_border.asp
MDN Web Docs - Padding: https://developer.mozilla.org/en-US/docs/Web/CSS/padding
MDN Web Docs - Margin: https://developer.mozilla.org/en-US/docs/Web/CSS/margin
MDN Web Docs - border: https://developer.mozilla.org/en-US/docs/Web/CSS/border
Summary
Here’s a quick summary for those who don’t want to read the whole article.
Padding adds visual breathing room within an element, while margin creates separation between elements.
The border defines the element’s edge and can be customised for various visual effects.
FAQs
Q1 - Why Can’t Padding Be Used Instead Of Margin?
Padding cannot be used instead of margin because it serves a different purpose. Padding adds space between an element’s content and its border. Margin adds space between an element and its surrounding elements.
Q2 - Does Padding Increase Size?
Yes, padding increases the overall size of an element due to how the box model works in CSS. However, you can change this behaviour by setting the “box-sizing” property of the element to “border-box”.
Q3 - Can Padding Be Negative In CSS?
No, padding cannot be negative in CSS.
Q4 - Why Do We Use Padding In Css?
We use padding in CSS to create space between an element’s content and its border.
Q5 - Why Do We Use Margin In Css?
We use margin in CSS to create spacing between elements and control the overall layout.
Conclusion
Thank you for taking the time to read the whole article. I hope you found it helpful.
If you need any help with building your website, don’t hesitate to reach out.
If you’ve found this article helpful, I kindly invite you to share it with a friend who might benefit from it!

Luca Da Corte is a freelance Framer Expert and SEO specialist. When he’s not working on some exciting projects, he curates a blog where he shares insights, resources, and experiences on everything regarding websites.
Table Of Contents:
Table Of Contents:
Table Of Contents: